You press the garage door remote button and... nothing happens. This frustrating problem affects thousands of Texas homeowners daily, but the good news: most remote issues have simple fixes you can handle yourself in minutes.
Here are the 10 most common reasons your garage door remote stops working and exactly how to fix each one - no professional required.
Fix #1: Replace the Batteries (95% Success Rate)
Dead or weak batteries are by far the most frequent cause of a remote that stops responding. The symptom pattern is usually gradual: the remote works fine, then starts requiring you to stand closer to the door, then gives up entirely. In Texas, that curve is steeper than you'd expect, because summer heat hammers batteries harder than in cooler climates.
Watch for these signs before the remote fails completely:
- Remote works intermittently
- Must be very close to door to activate
- LED light dim or doesn't illuminate when pressed
- Gradually stopped working over time
Replacing batteries takes about two minutes. Open the remote case (usually a small screw or a slide-open back), note the battery type printed inside (common types: CR2032, A23, AA, AAA), and swap in fresh ones from a quality brand - cheap batteries lose charge faster and occasionally leak. Confirm the polarity marks match, close the case, and test immediately.
- Open remote case (usually small screw or slide-open)
- Note battery type (common: CR2032, A23, AA, AAA)
- Replace with fresh batteries (buy quality brands - cheap batteries die faster)
- Verify polarity (+ and - match markings)
- Test immediately
Texas car interiors routinely hit 130-160°F in summer, and that sustained heat shortens battery life significantly. A remote stored in the cupholder lasts roughly half as long as one kept indoors. Expect about 6-12 months from a remote riding in the car, 1-2 years from a remote kept in the house, and 12-18 months from a visor-mounted unit that at least gets some shade.
Cost: $2-8 depending on battery type
Success rate if this was the issue: 100%
Fix #2: Check the Lock Button (Wall Panel)
This one trips up a lot of homeowners because the symptoms look serious when the cause is completely innocent. The lock feature - sometimes labeled "Vacation Mode" - disables every remote at once, which means every remote in the family suddenly stops working for no apparent reason. Kids press it while playing, cleaning cloths hit it by accident, or someone enabled it before a trip and simply forgot.
The giveaway is that all remotes go dead simultaneously while the wall button keeps working fine. Check the inside wall panel for these signs:
- ALL remotes stop working simultaneously
- Wall button still works fine
- No obvious cause for remote failure
To disable the lock, head inside the garage and follow these steps:
- Locate wall control panel (button mounted inside garage)
- Look for "Lock" button or icon (lock symbol, may say "Vacation Mode")
- Check if lock light is illuminated
- Press and hold lock button 3-5 seconds to deactivate
- Test remote
The button looks different depending on the panel generation. Older panels have a single button marked "LOCK." Modern digital-display panels show a lock icon on screen. Smart touchscreen panels bury the setting inside a security menu. Once you find and deactivate it, every remote comes back to life instantly.
Success rate: 100% if lock was engaged
Cost: $0 (free fix!)
Fix #3: Reprogram the Remote
Openers use rolling-code security, where the remote and opener share a synchronized code that changes after every use. A power outage, a power surge, or even ordinary memory corruption can knock that sync out of alignment. When it happens, the remote still blinks its LED but the opener ignores it completely, while other remotes and the wall button work without issue.
If that description matches what you're seeing, reprogramming restores the link in under two minutes. The process varies slightly by brand, but the core steps are the same:
Step 1: Locate "Learn" button on opener
The button sits on the back or side panel of the motor unit. The color tells you which security protocol your opener uses: purple or orange for Security+, red or yellow for Security+ 2.0. The button may be labeled "LEARN," "SMART," or "PROGRAM."
Step 2: Press and release Learn button
The LED light turns on and you have 30 seconds to complete the next step.
Step 3: Press remote button
Press and hold the button you want to program for 2-3 seconds. The opener lights will flash or you'll hear a click, confirming it learned the code.
Step 4: Test remote
Press the button from your normal operating distance. The door should respond immediately.
Brand-specific variations:
LiftMaster and Chamberlain openers take a single press of the Learn button (purple or orange), then press the remote within 30 seconds and hold until the opener lights flash. Genie's older models require pressing the Learn button 3-4 times until the LED stays steady, while newer models follow the standard 30-second window. Craftsman openers want you to press and hold the Learn button until the LED lights, then press the remote within 30 seconds.
If you have multiple remotes to pair, repeat the process for each one. Most modern openers can store anywhere from 5 to 40 remotes depending on the model.
Success rate: 85% if programming was the issue
Cost: $0 (free fix!)
Watch for: If reprogramming fails repeatedly, the opener's logic board may be failing.
Fix #4: Check Antenna on Opener
The opener receives your remote's signal through a wire antenna that hangs from the motor unit. When that wire gets tangled in the mechanism, pushed aside by stored items, or broken, the opener's receive range drops sharply. You might notice the remote only works when you pull right up to the door, or only from certain angles - both are classic antenna symptoms.
The antenna is typically a 6-12 inch wire hanging straight down from the motor unit. Common problems fall into three categories:
If the wire is blocked by an obstruction, such as a storage item, metal shelf, or coiled wire pressing against the mechanism, removing the obstruction and straightening the wire often restores full range immediately. If the wire is cut, frayed, or the connection point is loose, reconnect it if you can or replace the wire for $15-30. If the wire is simply coiled up or pressed against metal parts, extending it fully and letting it hang straight down is all it takes.
Once you know which problem you have, the physical fix is simple. Here is the sequence to work through:
- Locate antenna wire on opener motor
- Verify wire is intact and connected
- Straighten wire if coiled or tangled
- Point downward toward door
- Remove metal objects from vicinity
- Test remote from various distances
Success rate: 70% if antenna was the problem
Replacement cost: $15-30 for antenna wire
Fix #5: Address Signal Interference
Garage door remotes transmit on frequencies that can be disrupted by other electronics in and around the garage. The frustrating part is that interference is invisible and intermittent, making it easy to overlook. If your remote suddenly started struggling after you added a new WiFi router, installed LED fixtures, or parked a different car, interference is a strong candidate.
The most common culprits are cheaper LED bulbs in garage fixtures, LED headlights on cars parked nearby, fluorescent lights, WiFi routers mounted in the garage, baby monitors, wireless speakers, and smart home hubs. Metal objects between the remote and opener, including the car itself, can also block the signal path.
Diagnosing interference is a process of elimination. Work through these steps to narrow down the source:
- Test remote with garage lights OFF
- Move car if remote works better inside garage
- Temporarily unplug nearby electronics
- Test from different positions
Once you identify the source, the fix is usually straightforward. LED bulb interference is the most common, and the solution is replacing garage bulbs with opener-compatible LED bulbs from Genie or Chamberlain ($8-15 each) - standard LED bulbs were not designed to co-exist with opener frequencies. For WiFi routers, moving the router or switching to the 5GHz band reduces overlap. For metal obstructions, repositioning shelves away from the antenna path or testing from different angles reveals whether the path is clear.
Success rate: Variable depending on source
Cost: $0-50 (LED bulbs or repositioning items)
Fix #6: Reset the Opener
Sometimes the opener's logic board has a momentary glitch - a power outage, a surge, or just electronic noise - that leaves it confused. All remotes stop working, the wall button may be unresponsive, and the opener lights might flash in unusual patterns. A reset clears the glitch and brings the system back to normal operation.
Try a power cycle first. Unplug the opener from the outlet, wait a full 60 seconds to let the capacitors discharge completely, then plug it back in and wait 30-60 seconds for the unit to reinitialize. Test the wall button before the remote. If the wall button works but remotes don't, reprogram them using Fix #3.
If the power cycle does not help, a factory reset clears deeper memory problems. This erases every programmed remote and setting, so plan to reconfigure everything afterward:
- Locate Learn/Program button on motor
- Press and hold for 10-15 seconds (until LED goes out)
- Release button
- Opener is reset to factory settings
- Reprogram ALL remotes and wall panel
- Reset any smart features (WiFi, MyQ, etc.)
After a factory reset you need to reprogram every remote, the keypad if equipped, any WiFi or smart features, and reset travel limits and force settings if you had previously adjusted them.
Success rate: 60% for electronic glitches
Cost: $0 (free fix)
If reset doesn't work: Logic board may be permanently damaged ($100-300 to replace)
Fix #7: Clean Remote Contacts
Remotes accumulate grime, humidity, and over years of use, corrosion. The contact points inside the case - where the battery terminals connect and where the button pads press against the circuit board - gradually develop a thin layer of oxidation or debris that interferes with the electrical connection. The result is a remote that needs a hard press to respond, works only sometimes, or takes several button presses to register. In Texas coastal areas like Houston and the Gulf Coast, ambient humidity accelerates this process noticeably.
Cleaning the contacts takes about ten minutes and costs nothing if you have isopropyl alcohol on hand.
You will need a small Phillips screwdriver, 90%+ isopropyl rubbing alcohol, cotton swabs, and a pencil eraser for stubborn corrosion. With those in hand, follow these steps:
- Open remote case (remove battery first)
- Inspect circuit board - look for green or white corrosion buildup on battery contacts and button pads, and examine the contact points carefully
- Clean with alcohol - dip a cotton swab in alcohol and gently scrub battery contacts, circuit board contact points, and button pad contacts
- Remove corrosion - use a pencil eraser on corroded areas, rub gently until shiny metal is visible, blow away eraser debris, then follow with an alcohol pass
- Dry completely - wait 10-15 minutes for alcohol to evaporate before reassembling
- Reassemble and test
Most garage door remote problems have simple fixes you can clear in under an hour.
Success rate: 50% for corroded remotes, higher for simple dirt buildup
Cost: $0-5 (supplies)
If cleaning fails: Replace remote ($25-60)
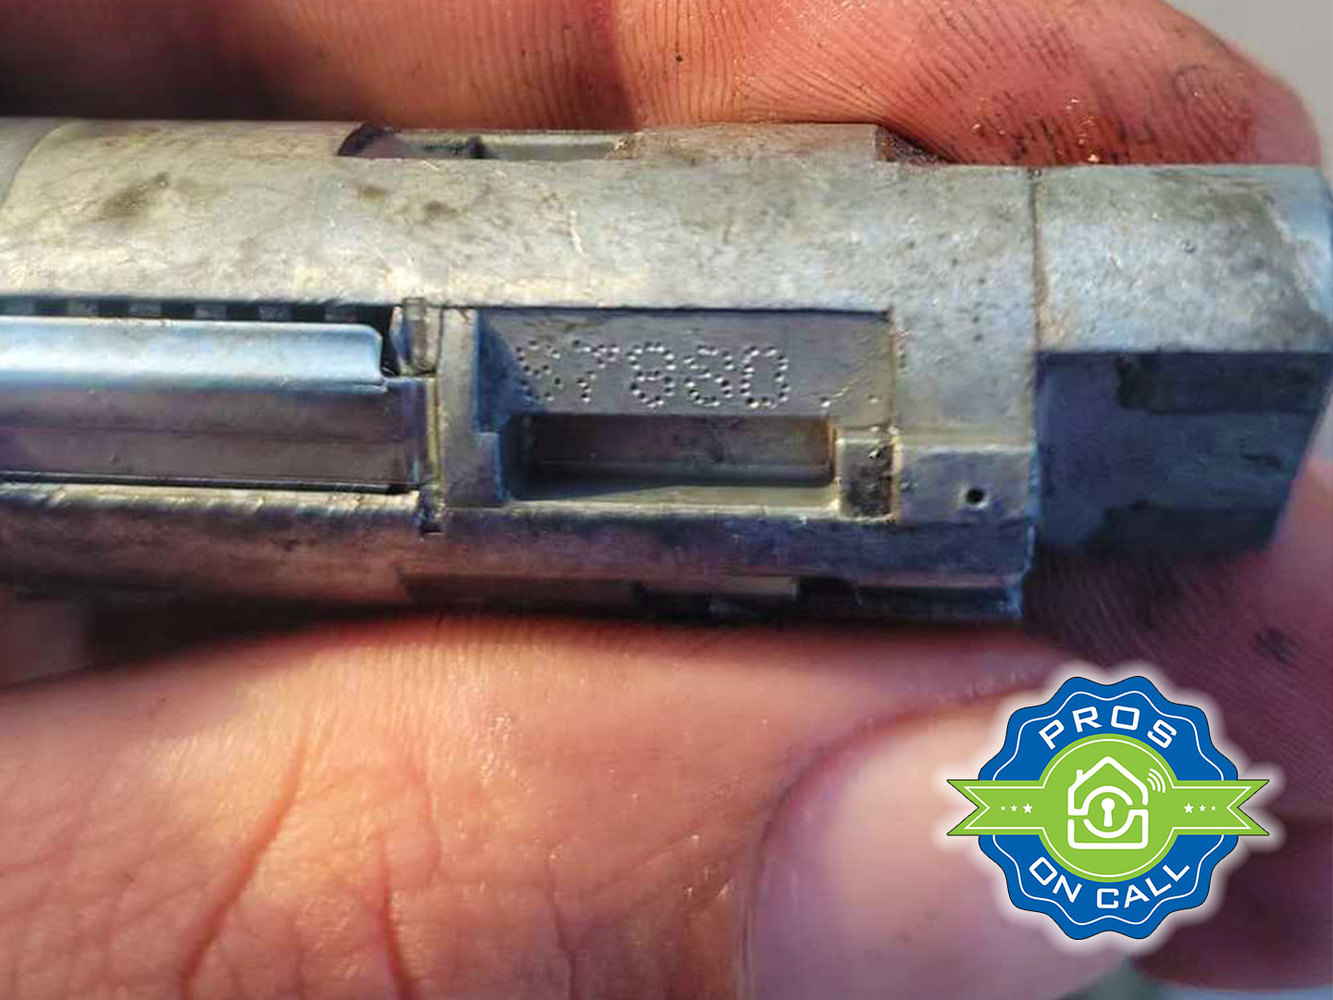
Fix #8: Check Remote Frequency Match
Buying a replacement remote is usually straightforward, but a mismatch between the remote's frequency and the opener's receiver frequency will leave you pressing a button that the opener never hears. This is most common when purchasing a generic replacement or when dealing with an opener manufactured before 2011, which may use frequencies that modern universal remotes don't cover.
Older openers (pre-2011) commonly used 310MHz, 315MHz, 372MHz, or 390MHz. Modern openers from 2011 onward standardized on 315MHz and 390MHz under the Security+ 2.0 protocol. The Learn button color on your opener is a reliable shortcut: purple or orange indicates Security+ at 315MHz, while red or yellow indicates Security+ 2.0 covering 315/390MHz.
Three quick checks will tell you whether a frequency mismatch is your problem:
- Check opener model number (label on motor unit)
- Find Learn button color to identify your frequency protocol
- Verify remote compatibility against the remote's packaging or the manufacturer's online compatibility chart - match the button count if replacing a multi-button unit
Universal remotes from Chamberlain (KLIK3U-BK at $40), Genie ($35), and LiftMaster (375UT at $30) cover most openers made after 1993. They do require programming via the Learn button and, for some older models, DIP switch settings - follow the remote's specific instructions rather than the opener's generic process.
Success rate: 100% once correct frequency remote obtained
Cost: $25-60 for new compatible remote
Fix #9: Inspect for Physical Damage
Remotes spend years bouncing around in car cup holders, getting dropped in driveways, occasionally falling in puddles, and sitting through Texas summers. Physical damage is not always obvious from the outside. A cracked circuit board, a loose solder joint, or a damaged transmitter chip can leave the case looking fine while the remote is electrically dead.
Visible damage worth noting includes a cracked case, broken button, or burn marks. Water damage typically shows up as green or white corrosion buildup, sticky buttons, or rust on internal components. Texas summer heat can warp the plastic case or melt the battery holder, which in turn puts stress on the circuit board.
Opening the case takes under a minute and reveals most damage immediately. Here is what to look for:
- Open remote case
- Look for cracks in the circuit board, loose or broken components, burn marks indicating electrical damage, corrosion, and warped or melted plastic
- Button check - press each button; it should click firmly with no sticking or mushiness
Minor corrosion responds to cleaning (Fix #7) and the remote may work fine afterward. Circuit board cracks and solder repairs are possible but risky unless you have electronics experience. Water damage with melted components almost always means the remote needs replacing.
Success rate: Variable, most damage requires replacement
Cost: $25-60 for replacement remote
Fix #10: Opener Range Issues
A remote that only works within a few feet of the opener is telling you something: either the transmitter is weakening, the opener's antenna or receiver is degraded, or there's interference collapsing the usable range. Normal range for most openers is 50-100 feet, though the exact figure varies by model and environment.
Install a fresh battery first and then test at graduated distances to isolate where the signal breaks down. At 10 feet the remote should work perfectly. At 25 feet it should work consistently. At 50 feet it should work most of the time. Consistent failure inside 20 feet with a fresh battery points to something beyond just the battery.
Before assuming the opener's receiver is failing, rule out these contributing factors:
- Antenna wire on opener (see Fix #4)
- Interference sources (see Fix #5)
- Remote transmitter strength by trying a different remote to compare
If the problem is a weak remote transmitter, replacing the remote ($25-60) with a higher-quality unit typically restores full range. If the opener's receiver side is the issue, cleaning the antenna connection point and checking for corrosion on the receiver board may help. A failing receiver board costs $80-150 to replace. Some opener models also accept an external antenna extension ($30-80 installed) that meaningfully improves range in garages with metal obstructions.
Success rate: Depends on source of range reduction
Cost: $0-150 depending on solution
When to Call a Professional
Most remote problems yield to the fixes above, but some situations point to a hardware failure that genuinely needs a technician. Call (888) 601-6005 when:
- None of these fixes work after a thorough run-through
- The opener doesn't respond to the wall button either - not just the remote
- The opener makes clicking sounds but the door doesn't move
- The logic board appears damaged or shows burn marks
- The opener is more than 20 years old and is likely due for replacement
- You're not comfortable with any part of the troubleshooting process
- Multiple problems exist at the same time
Likely issues requiring professional service:
A failed logic board runs $150-300 to replace and is the most common hardware-level cause of total remote failure. If the opener itself predates 1993, it lacks required safety features and replacement is the right call rather than repair. Full opener replacement lands in the $300-600 installed range. Complex wiring problems typically run $100-200 to diagnose and fix.
Prevention Tips
Keeping your remote healthy is mostly about protecting it from Texas conditions. Replace batteries annually before they fail rather than waiting for symptoms, and when you do buy batteries, buy quality brands - cheap cells discharge faster and sometimes leak. The single biggest thing most Texas homeowners can do is stop leaving remotes in the car during summer. A remote baking at 160°F through July and August will burn through batteries in a fraction of the normal time.
Here are the habits that extend remote life:
- Replace batteries annually (preventive, before they die)
- Keep remote out of extreme heat - don't leave it in the car during summer, store in the visor clip or cupholder with shade, and remove the battery if storing long-term
- Protect from moisture - avoid using near pools or water, dry immediately if wet, store indoors when possible
- Handle carefully - avoid dropping, don't over-tighten case screws (cracks the circuit board), keep away from heavy objects in a purse or pocket
- Test monthly - verify the remote works from normal distances, check LED brightness, and note any reduced range as an early warning
- Use LED bulbs designed for garage door openers - regular LED bulbs interfere with opener frequencies; opener-compatible bulbs run $8-15 each and are worth it
- Keep a spare remote - a backup is invaluable in an emergency, just test it occasionally and store it with a fresh battery
Quick Troubleshooting Checklist
Work through these in order. Most problems resolve within the first three steps.
- Replace batteries (Fix #1) - 2 minutes
- Check lock button (Fix #2) - 30 seconds
- Reprogram remote (Fix #3) - 3 minutes
- Verify antenna (Fix #4) - 2 minutes
- Remove interference (Fix #5) - 5 minutes
- Power cycle opener (Fix #6) - 3 minutes
- Clean contacts (Fix #7) - 10 minutes
- Verify frequency (Fix #8) - research required
- Inspect damage (Fix #9) - 5 minutes
- Test range (Fix #10) - 5 minutes
Running all ten fixes takes 30-45 minutes. In our experience, working through this list resolves the large majority of remote problems without a service call.
Common Questions
Q: Can I program a new remote without the Learn button?
No. Modern rolling-code openers require the Learn button for security. If the button is broken or inaccessible, you'll need professional help to access or replace the logic board.
Q: How many remotes can I program?
It varies by opener. Older units from before 2000 typically hold 4-8 remotes. Modern openers store 20-40. Check your manual for the specific model.
Q: Will a universal remote work with my opener?
Usually yes for openers made after 1993. Check compatibility before purchasing. Universal remotes run $30-50 and work with the vast majority of garage door openers on the market.
Q: Why did all my remotes stop working at once?
Usually one of three reasons: the lock button was activated on the wall panel, a power surge reset the opener, or the opener's logic board has failed. Start with Fix #2 to rule out the lock button, which is the easiest and most common cause.
Q: Can extreme heat damage remotes?
Yes. Texas summer car interiors reach 160°F+, which degrades batteries faster and can damage electronic components over time.
The Bottom Line
The most common remote failures have the cheapest fixes: fresh batteries at $2-8, deactivating the lock button for free, and reprogramming the remote for free. Less frequently, antenna work ($0-30), interference troubleshooting ($0-50), an opener reset (free), contact cleaning ($0-5), a frequency-matched replacement remote ($25-60), or addressing range issues ($0-150) are what's needed.
Try these fixes yourself before calling for service. Solving a battery or programming problem on your own saves the $75-150 service call charge for something that takes a few minutes to fix.
If nothing works: Call Pros On Call for professional diagnosis at (888) 601-6005.
Need Professional Help?
Pros On Call provides expert garage door remote and opener troubleshooting throughout Texas - Austin, San Antonio, McAllen, and beyond.
We diagnose persistent remote problems, replace logic boards and receivers, install new openers, program and sync all remotes, and verify that all safety features are working correctly. If you've run through these fixes and the remote still won't cooperate, we'll identify the root cause and give you honest recommendations for repair or replacement.
Call 24/7: (888) 601-6005
Family owned and operated since 2010 | Texas License #B19847
Next article: Garage Door Won't Open? Troubleshooting Guide for Emergency Situations
Content strategy and SEO by Optymizer