Rekeying a Kwikset lock is one of the most cost-effective ways to improve home security in Texas, especially when you've just moved into a new home, lost a key, or had a security concern. While professional locksmith rekeying costs $50-$150 per lock, the DIY approach can save you money if you're comfortable with basic tools.
This guide walks you through the complete process of rekeying a Kwikset lock, when to do it yourself, and when to call a professional.
What Does "Rekeying a Lock" Mean?
Rekeying means changing the internal pins inside a lock cylinder so that a new key will operate it, while the old key no longer works. The lock hardware stays the same, you're just changing which key opens it.
Rekeying means changing the internal pins inside a lock cylinder so that a new key will operate it, while the old key no longer works.
Most Texas homeowners rekey for one of a handful of practical reasons, and the circumstances matter because they affect how urgently you need it done and whether a locksmith makes more sense than a hardware store run. A new home purchase is the clearest case: you simply cannot know how many copies of the original key are floating around. Lost keys and former tenants or contractors who kept their copies are close behind. Some homeowners rekey just to consolidate several different keys into one, which is a convenience upgrade more than a security one. Others discover that a key broke off inside the cylinder and a rekey is the cleanest reset.
- New home purchase - You don't know who has copies of the old keys
- Lost keys - Cheaper than replacing all locks
- Security concern - Former roommate, contractor, or tenant had keys
- Matching keys - Consolidate multiple keys into one master key
- Broken key - Key broke off in lock, need to start fresh
Kwikset SmartKey vs. Traditional Kwikset Locks
Kwikset makes two types of locks with very different rekeying processes, and getting them confused before you buy a kit is the single biggest time-waster. Knowing which type you have takes about ten seconds and changes everything about the steps ahead.
Kwikset SmartKey Technology
SmartKey is Kwikset's answer to the rekeying hassle, and it lives up to the name. The lock ships with a small wire rekeying tool, and the whole process takes about 30 seconds without removing anything from the door. You can spot a SmartKey lock immediately: look for a small circular hole on the face of the lock, usually labeled "SmartKey," and no tools or cylinder disassembly are needed to change the combination.
- Easiest to rekey - Takes 30 seconds with the SmartKey tool (included with lock)
- Identifies as: Lock has small hole on side labeled "SmartKey" or came with a special rekeying tool
- DIY difficulty: Easy - No disassembly required
Traditional Kwikset Locks (Pin and Tumbler)
Standard Kwikset deadbolts and doorknobs without the SmartKey hole use the classic pin-tumbler design that every locksmith has worked with for decades. These require you to pull the cylinder out of the door, push out the plug, swap the pins to match your new key, and put everything back together. It is a moderate skill task, not a hard one, but it demands patience with small parts. Budget 30-60 minutes the first time you do it.
- More complex - Requires disassembling lock cylinder and replacing internal pins
- Identifies as: Standard deadbolt or doorknob without SmartKey hole
- DIY difficulty: Moderate - Requires lock disassembly and pin replacement kit
How to Rekey a Kwikset SmartKey Lock (30 Seconds)
SmartKey rekeying is genuinely fast, but it requires two things before you start: the current working key and the new key already cut to the code you want. Without both in hand, you cannot complete the process, so get the new key cut first at any hardware store. Have the SmartKey wire tool ready too, the small bent-wire tool that shipped with the lock.
- Current working key
- SmartKey tool (small wire tool included with lock)
- New key (cut to match new code)
Step-by-step process: Follow these seven steps in order. Skipping the half-turn on step one or pulling the current key before the new one is in place are the two mistakes that cause most failed rekeys.
- Insert current working key into lock and turn 90 degrees (quarter turn) to the right
- Insert SmartKey tool into small hole on side of lock (push firmly until you feel resistance)
- Remove current key while keeping SmartKey tool inserted
- Insert new key while SmartKey tool is still in place
- Remove SmartKey tool
- Turn new key back to vertical position and remove
- Test new key - Old key should no longer work
That's it! SmartKey technology is designed for instant rekeying without tools or disassembly.
SmartKey is especially useful across Texas metro areas where tenant turnover and short-term rentals create frequent rekeying needs. Austin's rental density, the military-family mobility around San Antonio, and the Airbnb volume in Dallas and Fort Worth all make a lock that rekeys in 30 seconds a practical choice rather than a premium.
- Austin - High rental turnover, frequent tenant changes
- Dallas/Fort Worth - Airbnb hosts rekey between guests
- San Antonio - Military families with frequent moves
How to Rekey a Traditional Kwikset Lock (Pin and Tumbler)
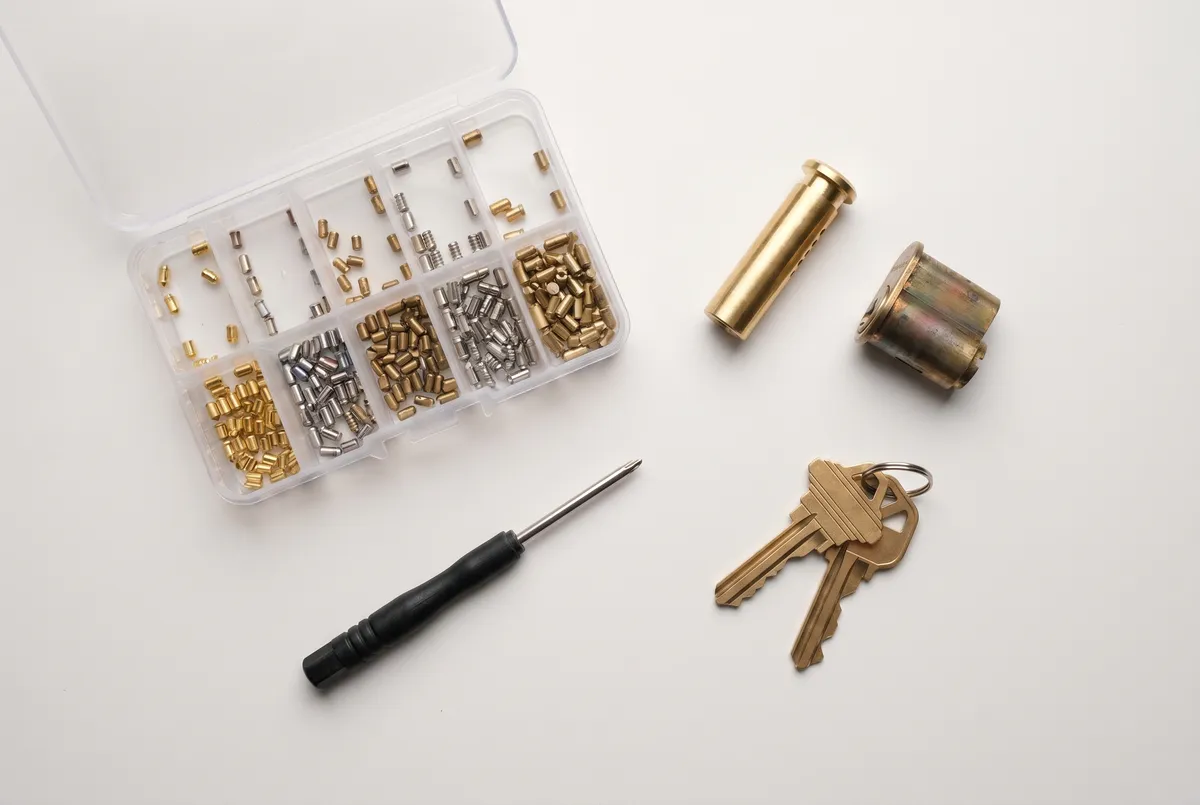
Rekeying a traditional Kwikset cylinder involves pulling the lock apart, swapping out the small brass pins to match a new key code, and reassembling everything precisely so the mechanism works cleanly. It is methodical work that rewards patience. A $15-$25 rekey kit from Home Depot or Amazon gives you all the pin sizes you need, typically enough to rekey six locks. Buy the right brand kit: Kwikset pins are not interchangeable with Schlage or other brands.
Gather these before you begin:
- Kwikset rekey kit ($15-$25 at Home Depot or Amazon)
- Screwdriver (Phillips head)
- Tweezers or needle-nose pliers
- New key (cut to desired code)
- Small container to organize pins
The rekey kit includes specific components, each with a job to do. The follower tool is the most important piece, it keeps springs in their chambers while you swap pins. Lose track of it mid-process and the springs scatter.
- 5 sets of pins (sizes 1-5)
- Follower tool (plastic cylinder to hold pins in place)
- Pinning tray (organizes pins by size)
- Instructions
Step 1: Remove Lock from Door
How you pull the lock depends on whether you are working with a deadbolt or a doorknob, and the two have meaningfully different release mechanisms. Take your time here and set the removed hardware on a clean surface before moving forward.
For deadbolts:
- Unscrew mounting screws on inside of door (2 screws on interior plate)
- Pull lock cylinder straight out from exterior side
- You should now have the lock cylinder separated from door
For doorknobs:
- Locate small hole on inside knob shaft
- Insert small screwdriver or pin into hole
- Push and turn knob to release from spindle
- Unscrew rose (decorative plate) and remove lock from door
Step 2: Remove Cylinder Plug
The plug is the rotating inner core that your key actually turns. Before you can swap pins, you need to slide the plug out of the outer cylinder shell using the follower tool. The follower tool does one job: it sits in the cylinder right behind the plug as you push it out, so the springs stay in their chambers and do not scatter. Skip the follower tool and you will be chasing tiny springs across your floor.
- Locate cylinder retainer clip on back of lock (small C-shaped clip)
- Use screwdriver to pry out retainer clip (careful not to lose it!)
- Insert current working key into keyway
- Turn key slightly (about 30 degrees) to align plug with cylinder
- Push plug out from back using follower tool
Critical: The follower tool must stay in place to prevent pins and springs from falling out as you remove the plug.
Step 3: Remove Old Pins
With the plug out, the old pins are sitting in small holes along the top of the plug, held up by the current key. Once you pull the key, they drop. Work over a pinning tray or a white towel so nothing rolls away, and keep sizes organized from position 1 to 5 because the positions matter when you install the new ones.
- Lay plug flat with keyway facing up
- Insert current key fully into keyway
- Pins should now sit flush with top of plug (key raises them to correct height)
- Remove key
- Tap pins out gently - they should fall into your hand or tray
- Organize old pins by size (you may reuse them)
Step 4: Install New Pins
This is where the actual rekeying happens. The new pins you select must match the cut depths on your new key exactly. A pin that is too tall or too short will prevent the shear line from clearing, and the cylinder will not rotate. Take it one position at a time and do not rush.
- Insert new key fully into keyway
- Check key code - Look at key cuts (the teeth). Deep cuts = low pins, shallow cuts = high pins
- Install pins from kit to match key cuts:
- Size 1 pin = Deepest key cut (low pin)
- Size 5 pin = Shallowest key cut (high pin)
- Each pin must sit flush with top of plug when key is inserted
- Double-check alignment - Wiggle key gently to ensure pins move freely
Kwikset uses five pin positions numbered from the tip of the key to the bow. Each position has a cut depth from 1 (deepest) to 5 (shallowest), and you match the pin size to the cut depth at that position. A key with the code 3-4-2-5-1 takes pin sizes 3, 4, 2, 5, 1 installed in order from tip to bow.
Step 5: Reassemble Lock Cylinder
Sliding the plug back in is the reverse of removing it, and the follower tool plays the same role in reverse: keep it pressed against the back of the plug as it seats so the springs behind it stay put. Once the plug is fully seated, replace the retainer clip and test before reinstalling on the door.
- Keep new key inserted in plug
- Align plug with cylinder (use follower tool to guide it back in)
- Push plug into cylinder while simultaneously pulling follower tool out
- Turn key to vertical position
- Replace retainer clip on back of cylinder (snap it into groove)
- Test new key - Should turn smoothly. Old key should NOT work.
Step 6: Reinstall Lock on Door
Reinstallation is straightforward, but test the lock from both sides before calling it done. A cylinder that works in your hand but binds when under door pressure usually means the mounting screws are overtightened or the strike plate is slightly misaligned.
For deadbolts:
- Insert cylinder through door from exterior side
- Align mounting holes
- Screw interior plate back in place
- Test operation from both sides
For doorknobs:
- Thread spindle through knob mechanism
- Attach exterior knob
- Screw rose (decorative plate) back onto interior knob
- Test lock and key operation
Common Rekeying Problems (And Fixes)
Even careful work can leave you with a cylinder that does not behave. Most problems fall into a short list of root causes, all of them fixable without starting over.
Problem: New key doesn't turn smoothly
When a new key requires real force to turn, a pin is either the wrong size or not fully seated in its hole. The fix is to remove the plug and work through each position again against the new key, confirming each pin sits flush at the shear line with the key fully inserted.
Cause: Pins are wrong size or not seated properly Fix: Remove plug and double-check pin sizes against key cuts
Problem: Lock is "sticky" or hard to turn
A sticky cylinder usually means a pin spring got bent during reassembly and is pressing a pin down at an angle instead of straight. Pull the plug again and inspect each spring, straightening or replacing any that are not sitting vertical in their chambers.
Cause: Pins are binding or springs are misaligned Fix: Remove cylinder and check that all springs are straight and pins move freely
Problem: Key turns but lock doesn't engage
The retainer clip holds the plug in place inside the cylinder. Without it, or if it is only partially seated, the plug spins freely without driving the cam that throws the bolt. Check the clip groove around the back of the cylinder and press the clip firmly until it snaps in.
Cause: Cylinder retainer clip is missing or misaligned Fix: Replace retainer clip and ensure it's fully seated in groove
Problem: Old key still works
If the old key turns the rekeyed lock, the pin change did not take. Either the wrong pins were installed or they were put in the wrong positions. Pull the plug, compare each installed pin to the new key's cut depths, and replace any that do not match.
Cause: You didn't actually change the pins (or changed them incorrectly) Fix: Verify new pins match new key cuts. Test with both old and new keys.
Problem: Lock cylinder won't go back into door
The plug has to be in the vertical (key-out) position and sit flush with the cylinder body before the assembly will slide cleanly into the door bore. If the retainer clip is seated before the cylinder is fully inserted, it will catch the door edge and block installation.
Cause: Plug is not aligned correctly or retainer clip is blocking Fix: Turn key to vertical position and ensure plug sits flush with cylinder body
When to DIY vs. Call a Professional Locksmith
The honest answer is that DIY rekeying makes good sense for some situations and poor sense for others, and the difference usually comes down to how many locks you need to do and what type they are.
DIY Makes Sense If:
DIY is a real winner when you have SmartKey locks (the 30-second process makes it trivial), when you are comfortable working with small mechanical parts, and when you have one or two locks to do with no time pressure. Having the right rekey kit on hand before you start is the difference between a smooth job and a mid-project hardware store run.
- You have Kwikset SmartKey locks (30-second rekey)
- You're rekeying 1-2 locks and have time to learn
- You're comfortable with small parts and mechanical puzzles
- You have a rekey kit and tools ready
- Lock is easily accessible and removable
Call a Professional If:
Five or more locks is the clearest signal to call us. A licensed locksmith brings the full pin kit, does the job on-site without removing your locks, and moves through multiple cylinders faster than a first-time DIYer works through one. High-security locks, master key systems, and damaged cylinders are also situations where professional tools and training save you from a frustrating outcome.
- You're rekeying 5 or more locks (professional is cost-effective)
- Lock is high-security or commercial grade
- You need master key system setup
- Lock is damaged or worn out
- You're in a hurry (locksmith can rekey on-site in 10 minutes)
- Lock is installed in gate, garage, or hard-to-reach location
Professional rekeying pricing in Texas follows a consistent structure: the service call covers the first lock, and additional locks on the same visit cost significantly less. A licensed locksmith comes to you, rekeys cylinders on-site without removing them from the door, and typically cuts new keys on the spot.
- 1st lock: $75-$100 (includes service call)
- Additional locks: $25-$40 each (same visit)
- Mobile service: Locksmith comes to you, rekeys on-site, no lock removal needed
Texas-Specific Considerations
High Heat and Lock Maintenance
Texas summers create a mechanical challenge that homeowners in cooler states rarely think about. When temperatures push past 100 degrees F, door frames expand, and that expansion can shift a cylinder just enough to cause binding or premature wear on pins. After rekeying, lubricate the cylinder with graphite powder or Teflon spray rather than WD-40. WD-40 attracts grit and dries into a residue that makes the binding worse over time. Check alignment twice a year, spring and fall, and consider weather-resistant cylinders for exterior doors in high-humidity areas like Houston or the dusty West Texas climate around El Paso.
- Lubricate after rekeying - Use graphite powder or Teflon spray (not WD-40)
- Check alignment twice per year - Heat expansion can misalign door frames
- Consider weather-resistant locks - For exterior doors in Houston humidity or West Texas dust
Security Concerns in Major Texas Cities
The practical reasons to rekey vary by city in ways that reflect how people actually live in each market. Austin's rental market turns over constantly, and landlords and new tenants both have strong reasons to rekey at every transition. San Antonio's large military population means frequent moves and keys that get handed off in ways that are hard to track. Houston homeowners who shared keys with neighbors or contractors during hurricane evacuations often rekey when they return. Dallas and Fort Worth hosts running Airbnb or VRBO properties rekey between long-term guests as a standard practice.
- Austin: High rental turnover - Rekey when tenants change
- San Antonio: Military bases - Rekey when new personnel arrive
- Houston: Hurricane evacuations - Rekey if you gave keys to neighbors/contractors
- Dallas/Fort Worth: Airbnb/VRBO hosts - Rekey between long-term guests
Texas Property Code and Locks
Texas landlords do not have a choice about rekeying between tenants. Under Texas Property Code Section 92.156, the obligation is clear: the landlord must rekey at the landlord's expense not later than the seventh day after each tenant turnover date. Beyond the legal requirement, professional rekeying gives landlords a dated receipt that documents exactly when the rekey was done, which matters if a security dispute ever comes up later. The cost is also deductible as a maintenance expense, which makes the math even cleaner.
- Tax deductible as a maintenance expense
- Legally required for tenant security
- Recommended documentation - Keep receipts showing rekey dates
Texas landlords must rekey between tenants under Property Code Section 92.156. Professional rekeying is tax deductible and provides documented proof of compliance.
How Much Can You Save by DIY Rekeying?
The savings are real, but they depend on how many locks you are doing and how you value your time. A $20-$25 rekey kit covers six locks, so the per-lock material cost is roughly $4. Add $3-$5 per new key cut at the hardware store. For three locks, you are looking at about $35 in materials plus 1.5-3 hours of your time, since each lock takes 30-60 minutes the first time through.
DIY Cost Breakdown: The kit is the only real upfront cost, and it covers six locks, so the per-lock material expense is low. The variable is your time.
- Kwikset rekey kit: $20-$25 (rekeys 6 locks)
- New keys cut: $3-$5 per key
- Time investment: 30-60 minutes per lock (first time)
Total for 3 locks: about $35 plus your time
Professional Cost: The service call covers dispatch and the first lock. Additional locks on the same visit are priced at a reduced rate since the technician is already there.
- Service call: $75
- Lock #1: Included in service call
- Locks #2-3: $30 each = $60
- New keys: Usually included
Total for 3 locks: about $135
Savings: $100 for DIY (if you value your time at $0)
Break-even point: If you're rekeying 3 or more locks, DIY saves money. If just 1 lock, professional is faster and not much more expensive.
Rekeying vs. Replacing Locks - Which Is Better?
| Scenario | Rekey | Replace |
|---|---|---|
| Just moved into new home | Best option | Only if locks are damaged |
| Lost keys | Best option | Unnecessary expense |
| Lock is 10 or more years old | Maybe | Recommended (upgrade security) |
| Broken lock mechanism | Won't fix problem | Required |
| Want smart lock | N/A | Upgrade to Kwikset Kevo or Halo |
| Need master key system | Professional rekey | Not necessary |
Need Help Rekeying Kwikset Locks in Texas?
Our licensed locksmiths serve all of Texas with on-site rekeying that does not require removing your locks from the door. We carry the full range of Kwikset pin kits and can rekey multiple cylinders to a single key in one visit. For landlords who need documentation, we provide dated receipts that satisfy Texas Property Code requirements. License #B19847.
Call us at (888) 601-6005 for a free estimate on professional lock rekeying anywhere in Texas.
The most common situations we handle are straightforward. New homeowners who want all locks matching one key. Landlords rekeying between tenants to stay compliant with Section 92.156. Businesses setting up master key systems for multiple access levels. Emergency rekeys after a lockout or security concern.
- New homeowners who need all locks rekeyed to match one key
- Landlords who need rental properties rekeyed between tenants
- Businesses that need master key systems setup
- Emergency lockout situations where rekey is needed immediately
Service areas: Austin, San Antonio, Houston, Dallas, Fort Worth, El Paso, Arlington, Corpus Christi, Plano, and all major Texas metro areas.
Last updated: December 2025 | Based on GSC performance data showing 46 clicks and 13,303 impressions over 16 months. This guide is optimized for Texas homeowners searching for DIY locksmith solutions.
Content strategy and SEO by Optymizer